Most camera reviews are pretty decent when it comes to photo and video quality (although for the type of cameras I buy, photo quality is usually an afterthought1). The thing that seems to be left out is the annoying nits and limitations that you become aware of after using something for a while. I just upgraded from the DJI Mini 2 to the DJI Mini 3 Pro and oh boy do I have nits to share.
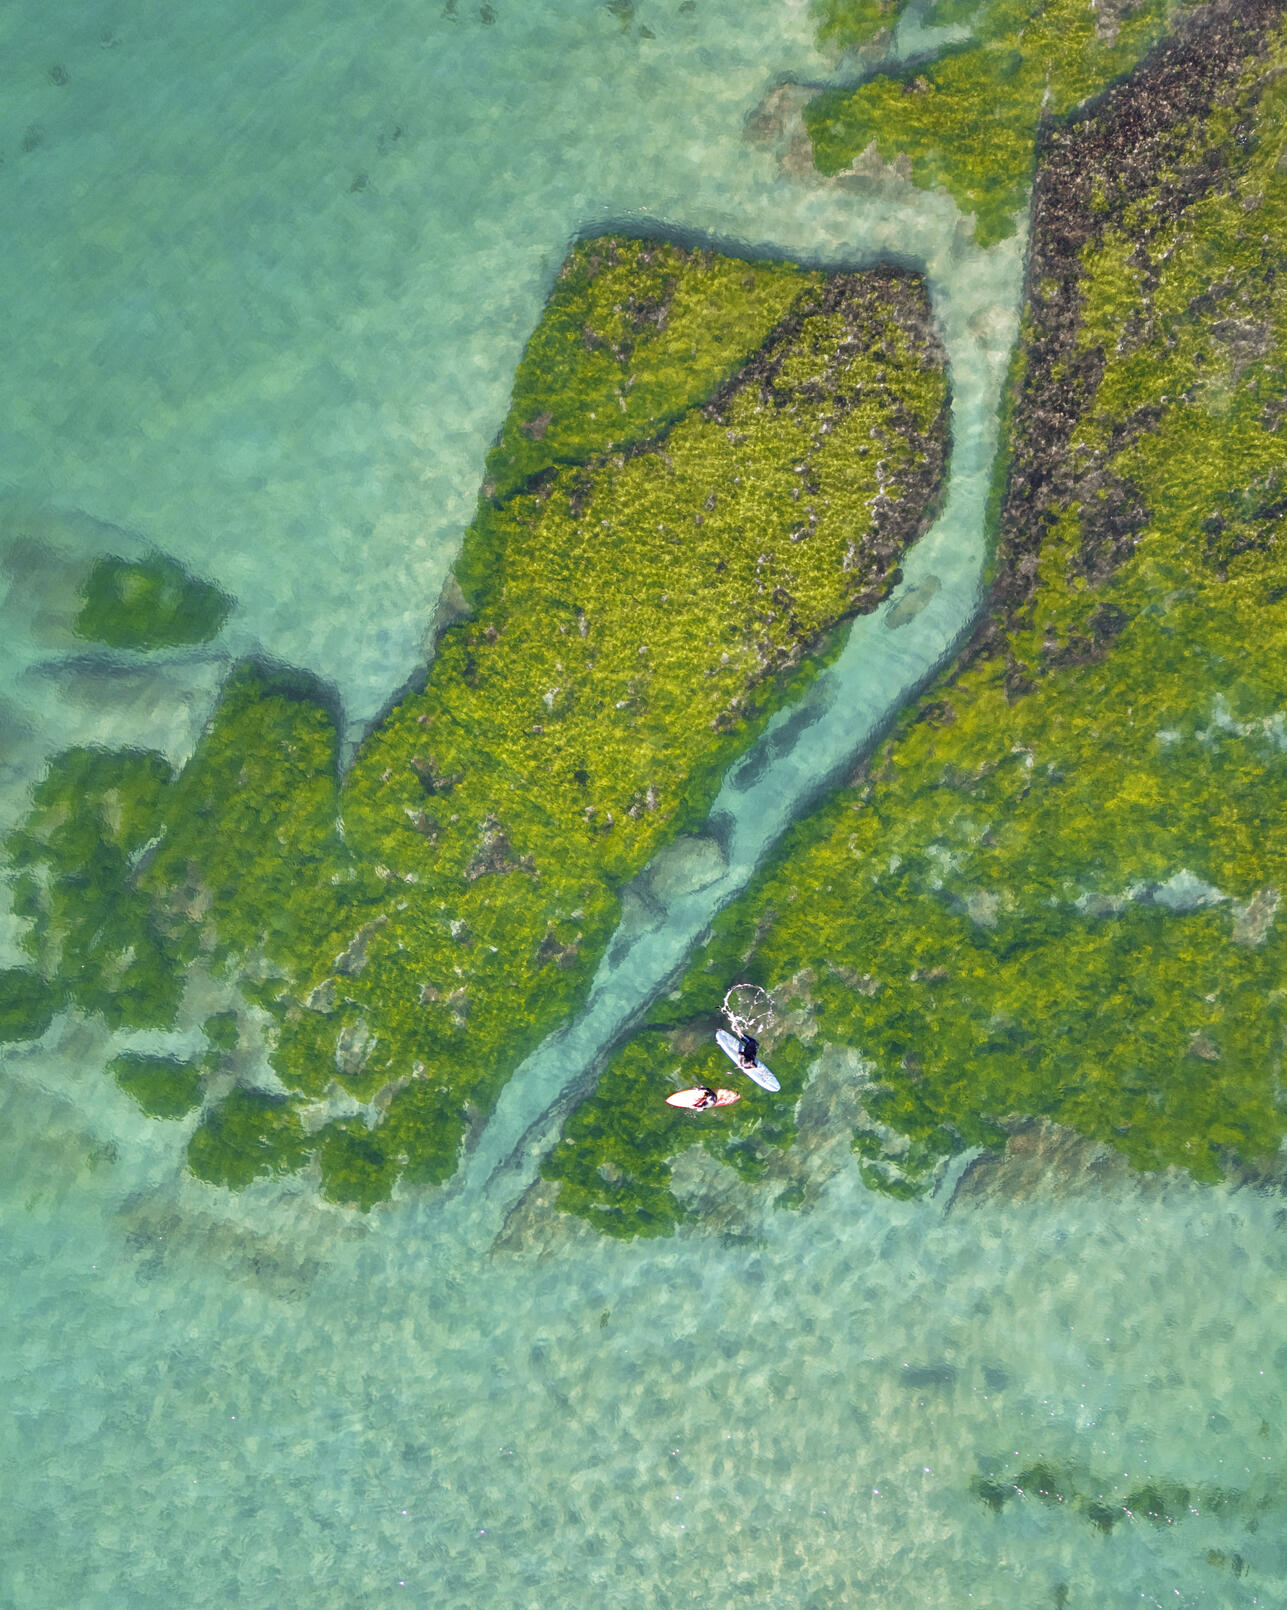
Shot on the Mini 3 Pro, this one had plenty of room to play with the colours.
Although I would be remiss to omit the difference in image quality. The Mini 3 Pro (which I will just call the “Mini 3” from here to save on typing) is substantially better than the Mini 2. The Mini 2 has a 6.3x4.7mm sensor with a fixed f2.8 aperture, whereas the Mini 3 has a 9.7x7.3mm sensor at f1.7. The much larger sensor (71mm2 versus 30mm2) and larger aperture mean the Mini 3 can shoot with a lower ISO and at a faster shutter speed.
Looking at some of the photos I’ve taken at the beach at the same time of day, the Mini 2 shot at 1/1250s and the Mini 3 shot at 1/2500s. I’ve seriously considered whether I should get an ND filter to let me slow the shutter speed down—that’s just how fast it shoots. This gives me a lot of confidence that I can keep the ISO really low during sunset, sunrise, or on an overcast day (since flying at night in Australia is a no-no).
I don’t really understand enough about cameras to accurately explain why you can edit the Mini 3 photos more. There’s more dynamic range? More bits? Deeper bits? Something for me to understand another time. The end result is that editing the Mini 2 photos feels like trying to sculpt almost-dry clay. You can’t really make substantial changes, and if you try too hard you’ll end up breaking something. On the other end of the spectrum is raw files from the a6500, which can be edited like modelling clay. The Mini 3 isn’t nearly as flexible as that, but it’s substantially better than the 2. I can actually recover some of the highlights, and I don’t have to discard photos because the sky is completely blown out.
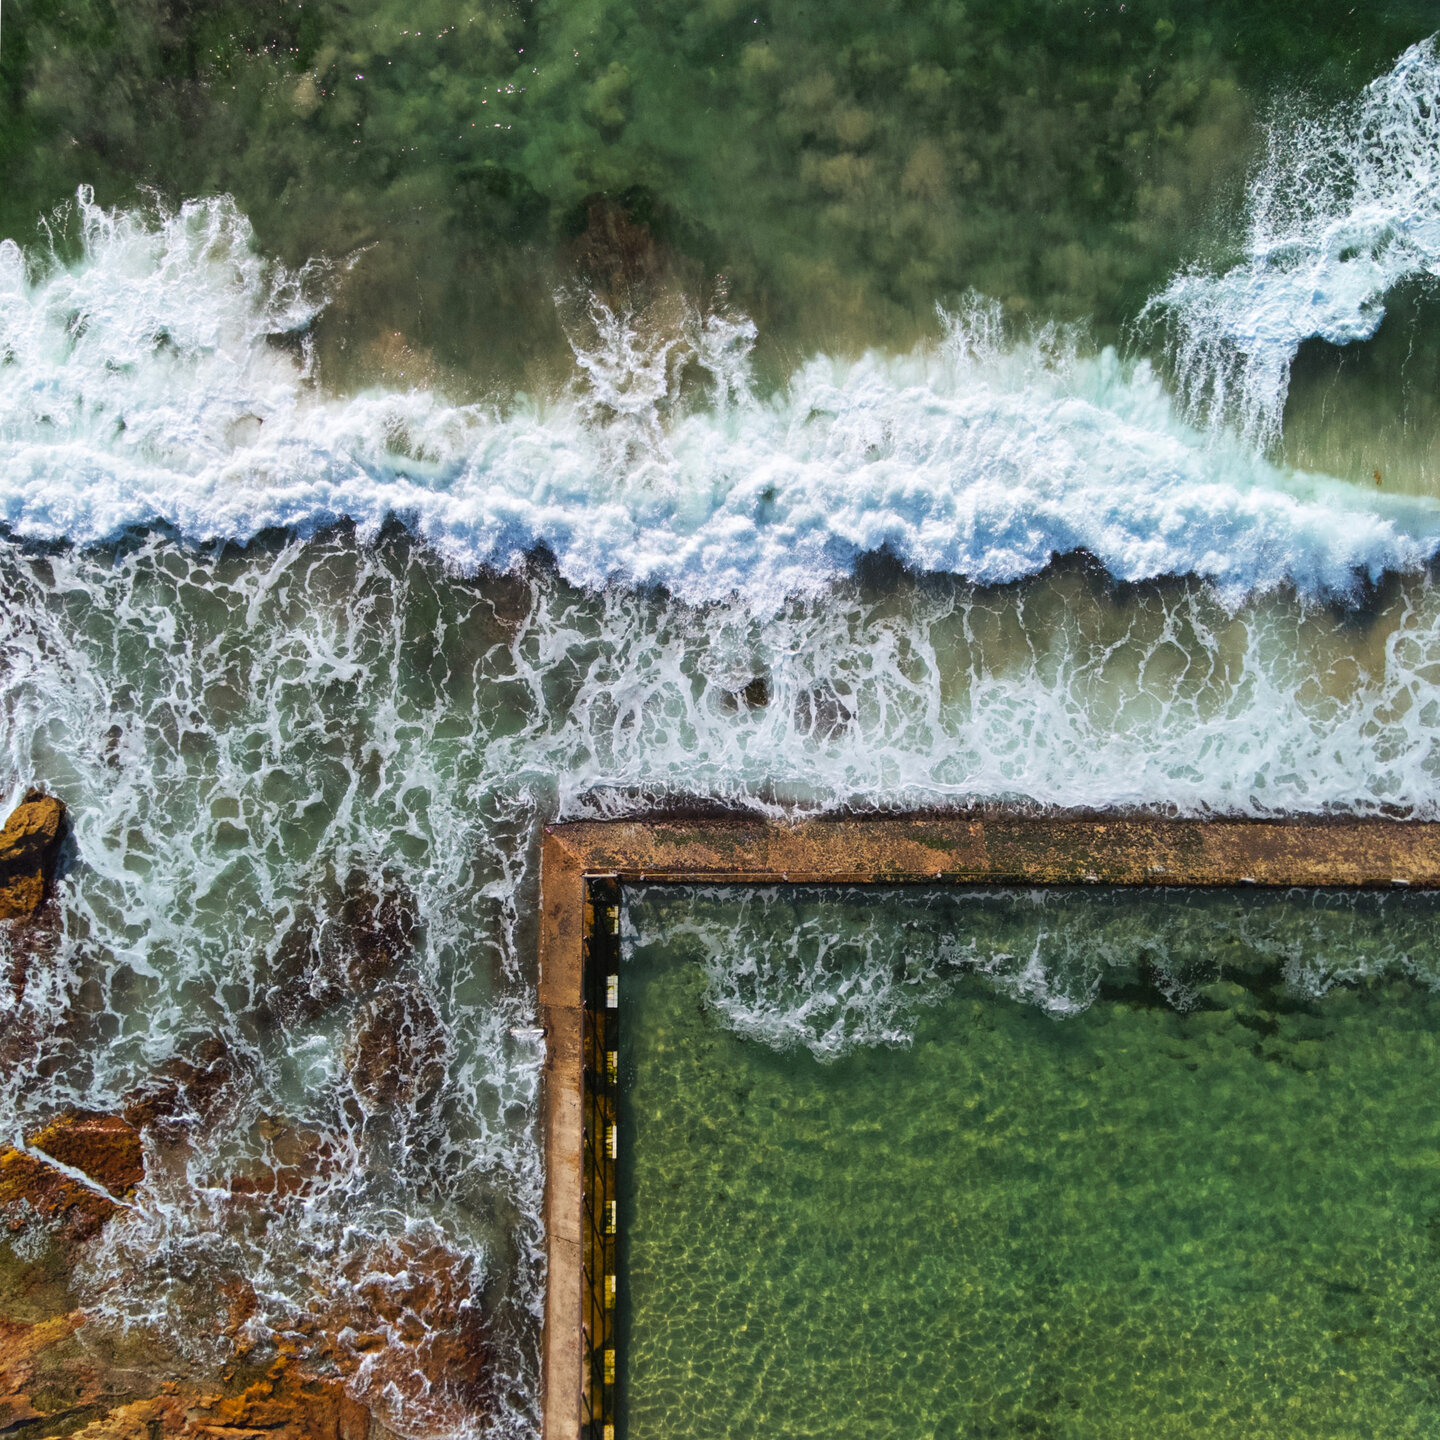
Shot on the Mini 2, it’s challenging to get the exposure of the waves right without making the whole image too dark. This is easier in the Mini 3, but still easy to get wrong.
On the Mini 2 I would shoot everything with AEB, so I’d get three photos at different exposures. If I messed the exposure up I could use the brighter or darker exposed version (or both). I have been using this with the Mini 3 on occasion, but have found that the range of a single shot is good enough. The trick seems to be to underexpose quite significantly (I’ve been shooting at between -1EV to -2EV during bright days), which retains highlight detail while still keeping good detail in the shadows.
I haven’t used the 48MP mode enough to have a good feeling of when it makes sense to use it. It would be left on all the time if it didn’t take significantly longer to capture a photo compared to the single-shot mode (since low-light isn’t really possible in Australia). The photos do have an impressive amount of detail, so my thinking is that I’ll only turn it on when I’m taking a shot that could look good printed out really big, or needs to be cropped significantly.
The #1 reason to upgrade to the Mini 3 is actually the improved experience of capturing a top-down panorama. Let me explain.
If you don’t want to capture something from really high up (since the legal limit is 120m) you can capture multiple top-down shots and stitch them together, creating the illusion of taking a photo from a much higher altitude. To do this you point the camera straight down, take a photo, fly the drone forwards, take another photo, and repeat in a grid.
When the drone is stationary, the camera points directly down. When it flies forward, the drone body tilts forward and the camera gimbal tilts upwards to compensate—keeping it pointed down. When the drone stops (especially if it stops suddenly) the body tilts backwards to counteract its forward momentum. The gimbal tries to keep the camera pointed down, but the gimbal on the Mini 2 doesn’t rotate far enough to compensate for the backwards angle of the drone. The result is that the camera view appears to be “kicked” upwards whenever the drone comes to a stop, and you have to adjust it back down before taking each shot.
This could be worked around in software in the Mini 2—once the breaking move is complete, readjust the gimbal to be in the position it was while the drone was in motion. Or you could just re-engineer the next version of the drone to allow the gimbal to rotate far further backwards, allowing it to stay pointing downwards no matter what the drone is doing.
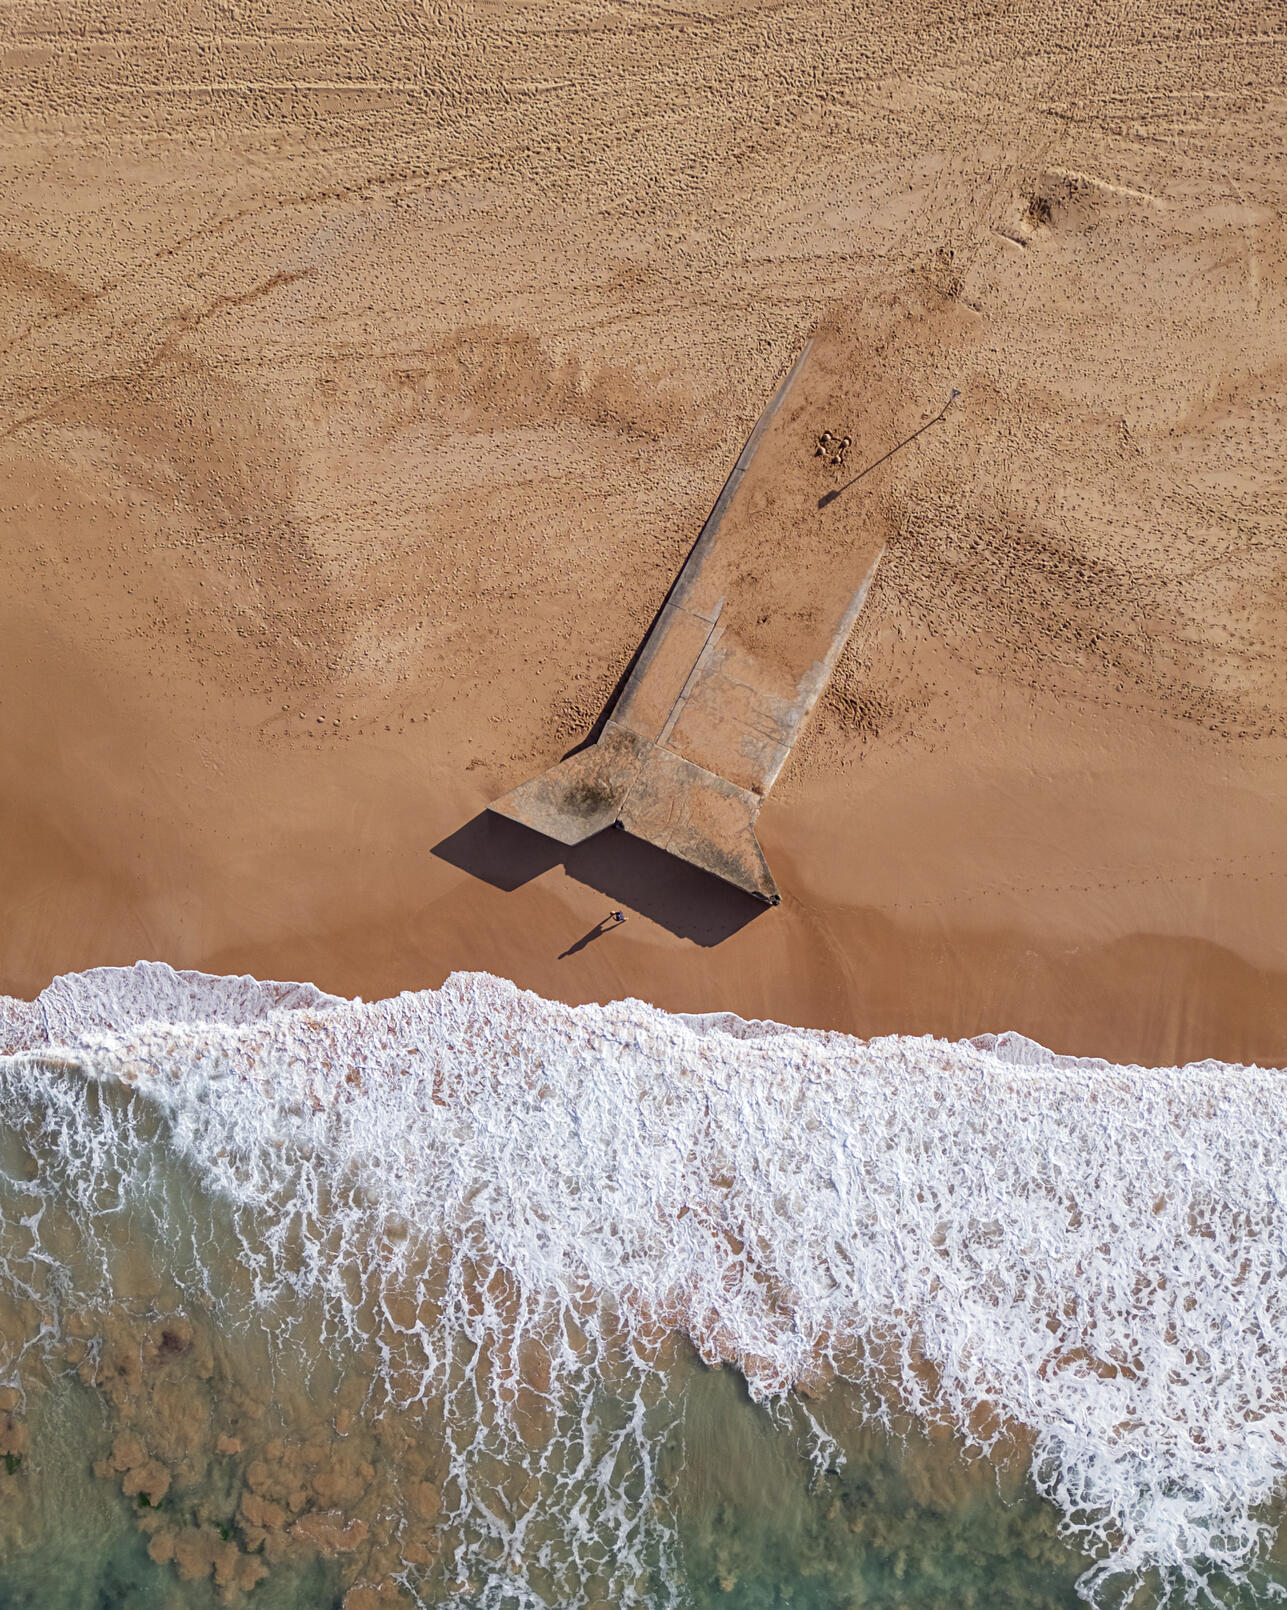
Shot on the Mini 3 Pro, it’s not too hard to play with the colour from the raw image, and the detail of the footprints in the sand is impressive.
In reality the best thing about the Mini 3 is having true vertical shooting. I don’t know if I’m just a slave to the Instagram 4:5 format or if there’s some other explanation, but I love shooting vertically on the Mini 3. The perspective of a linear feature stretching off into the distance is probably my second favourite drone angle after a top-down shot. With the Mini 2 I would have to throw away almost half of the pixels to get this perspective, but now I can get it for free.
Shot on Mini 2, getting a vertical composition means cropping out the left and right sides of the image.
The next nit is capture speed. The Mini 2 would pause for what seemed like an eternity while it took a photo, and the entire interface would be locked out—including the video feed. The Mini 3 is substantially better, the video feed only drops for a moment and you’re able to see where you’re going while it saves the photo. This is probably the biggest quality-of-life issue I have with the Mini 3, I’d like to be able to just fly around and take photos without having to pause while it reads all the pixels off the sensor.
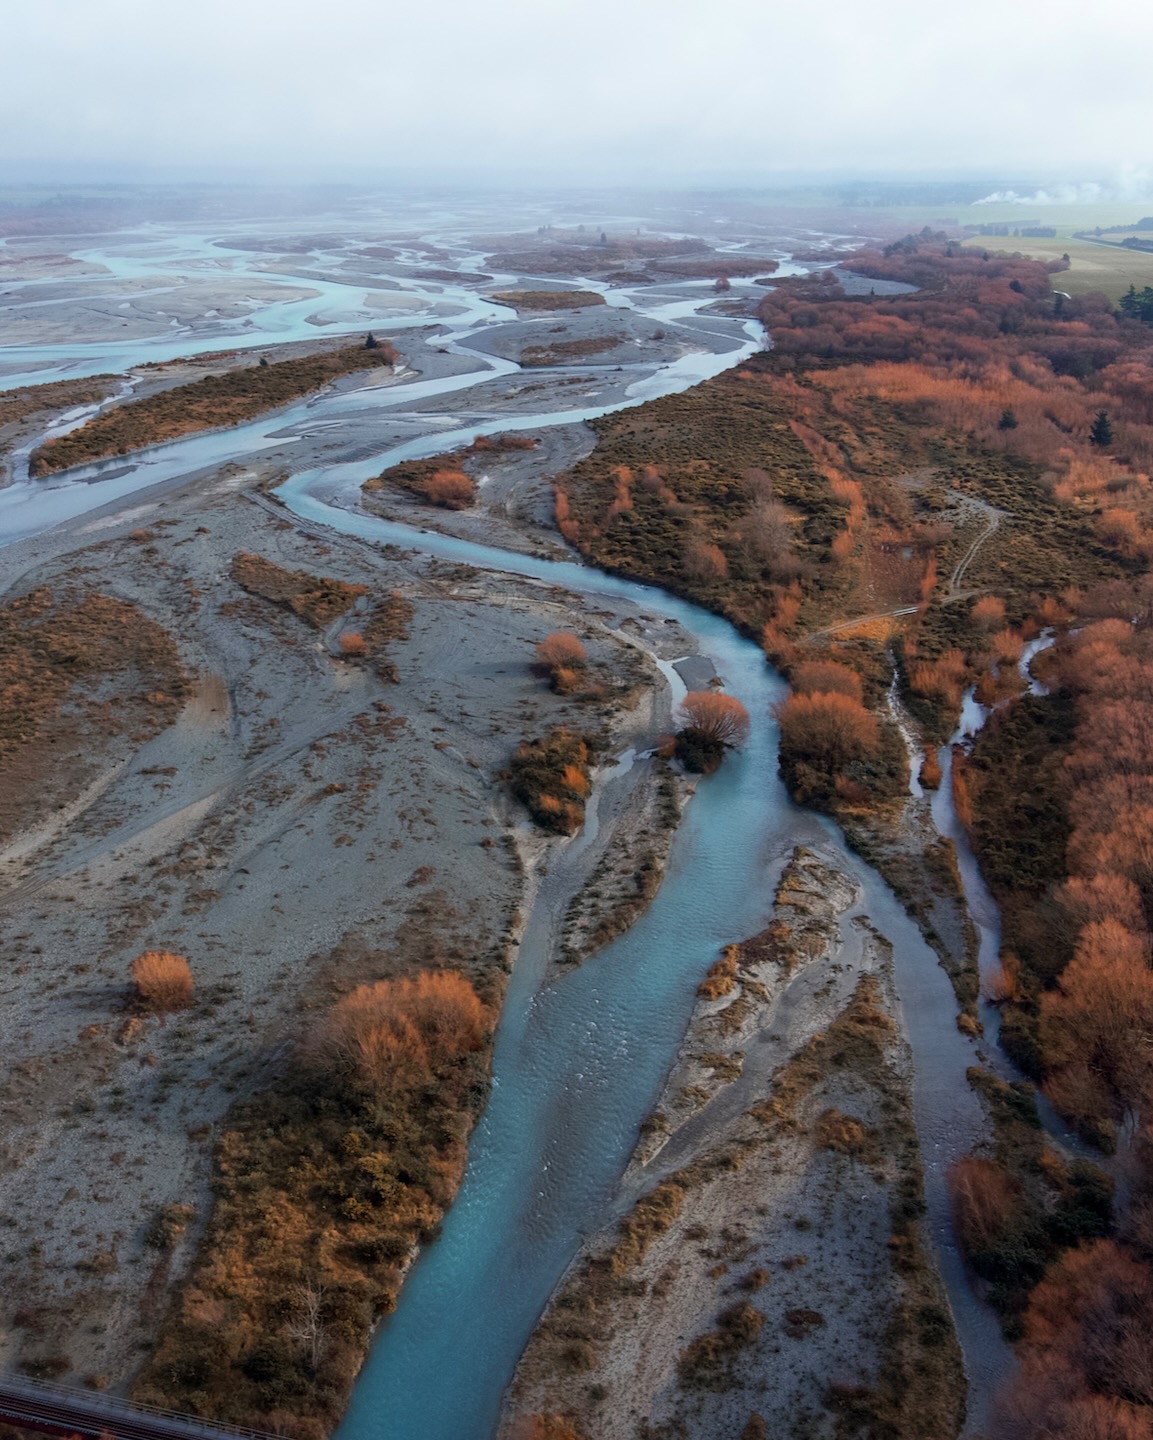
It hasn’t been too windy around here so I haven’t been able to see how wind-hardy the Mini 3 is, but the Mini 2 would rarely get too bothered by the wind. It would occasionally complain that there was too much wind for it to get home automatically, but you could always keep going and just hope you could fly it home yourself. Probably the most stressed I’ve been while flying a drone was after taking this picture (below), doing another flight further up the valley on the same battery and flying downwind, and then having to fly back against the wind above a huge drop-off with the battery close to running out. Don’t do that, it’s a bad idea. Although the Mini 2 handled the wind like a champ, and I am assured that the Mini 3 is even more capable.
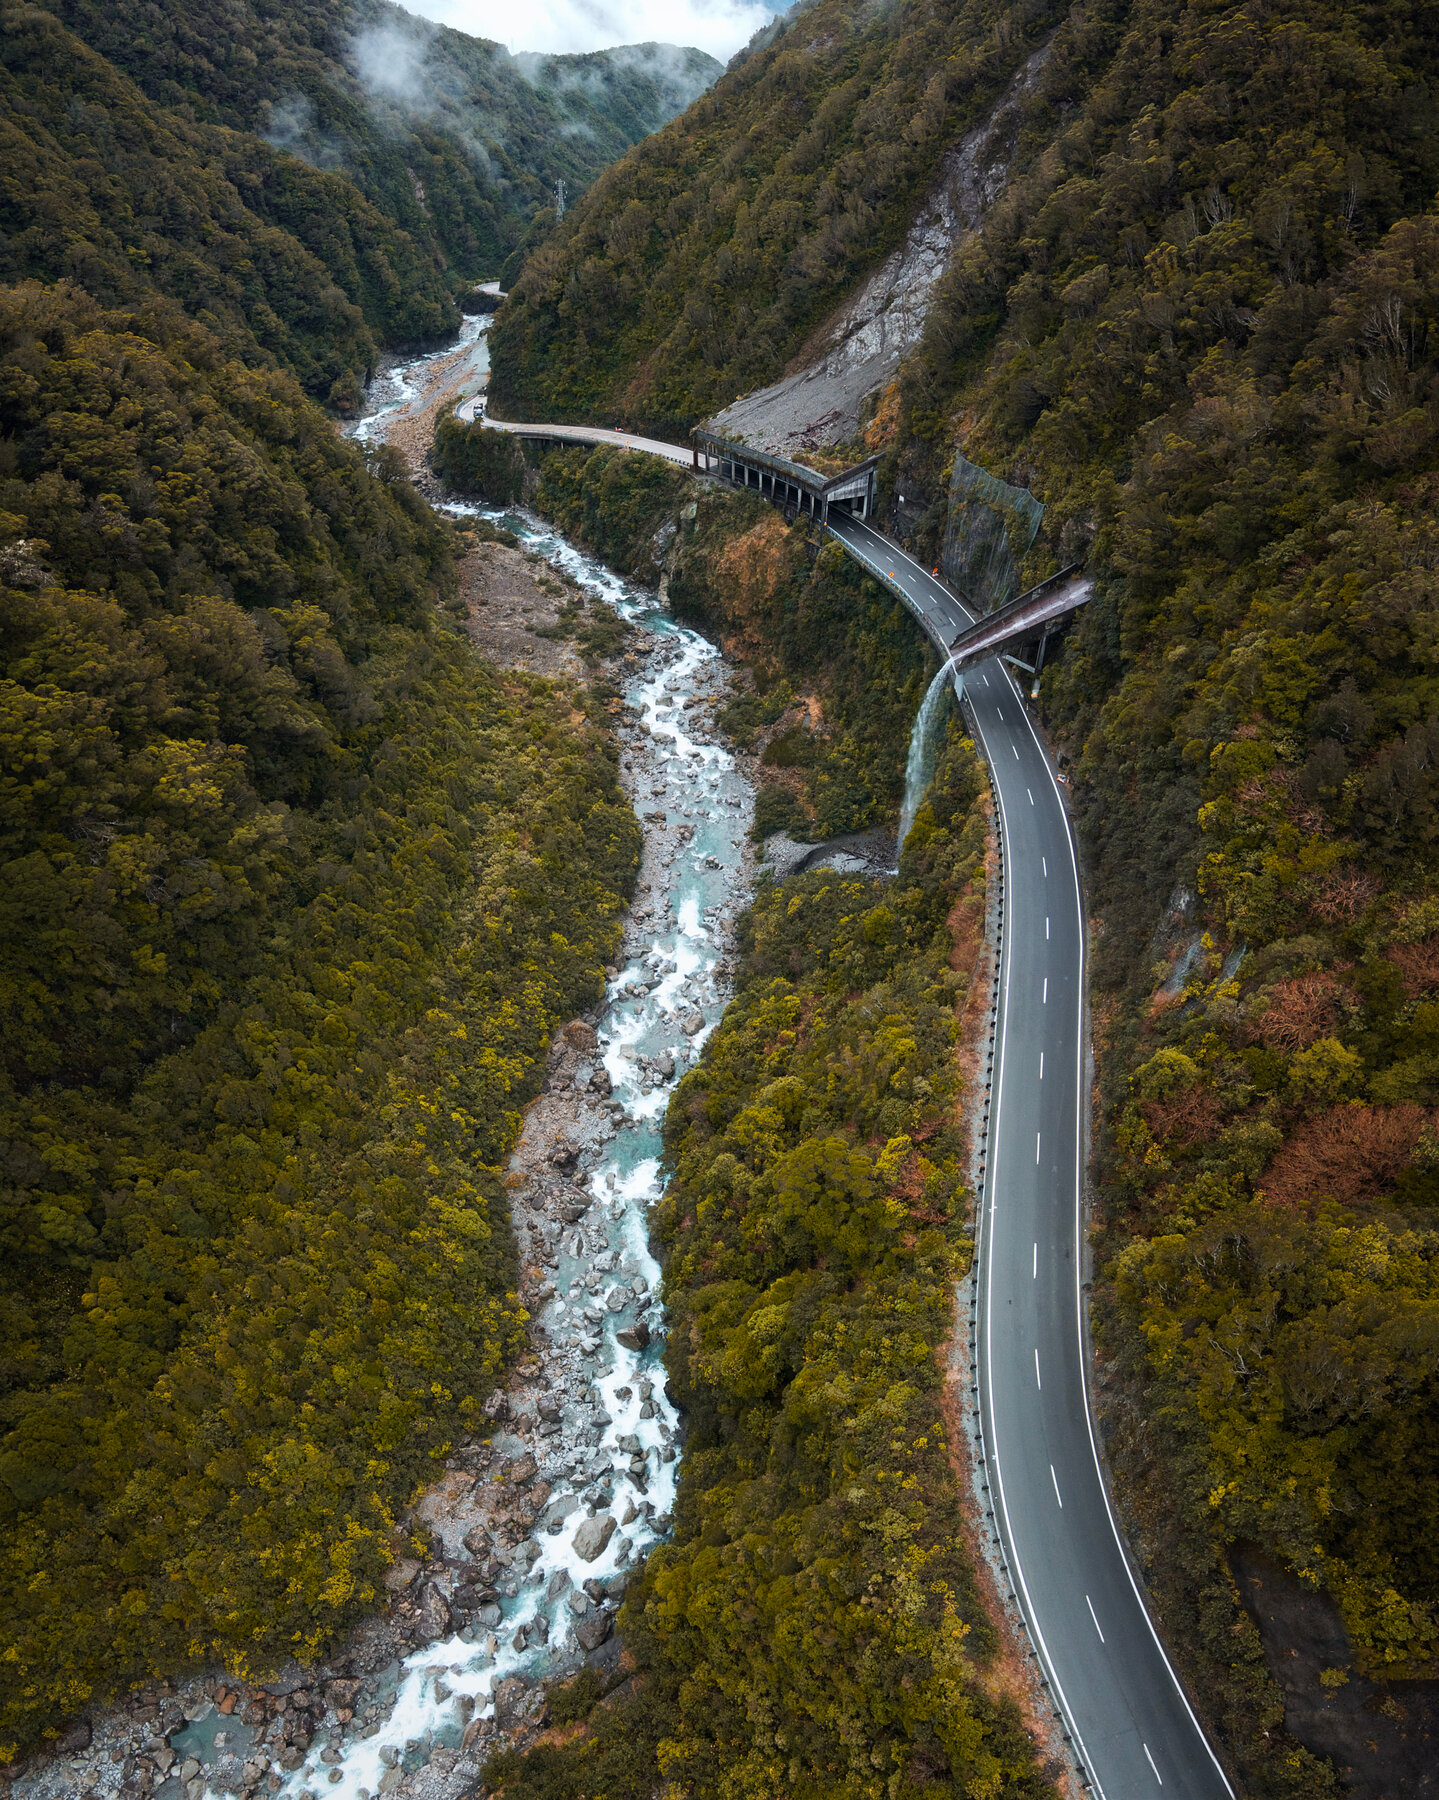
Shot on Mini 2, you don’t want your battery to run out while over something like this.
My impression of the controller from watching reviews is that the DJI RC—the one with the built-in screen—is completely life-changing and revolutionises the drone-flying experience. I wasn’t convinced, and I only got it because there was a good second-hand price.
I remain unconvinced after using it.
The controller is really good, it’s well-built and comfortable to hold, the buttons are positioned well, and the screen is bright enough to see in sunlight. The shutter button has a two-step press which allows you to focus before you shoot, there are more customisable buttons than the standard RC-N1 which lets you control the portrait-mode camera and suchlike. These are mostly minor benefits, and not something I’d recommend most people spend the extra money on.
The most common claim that reviewers make is that it’s much faster and more convenient to not need a phone to use the drone. Naturally I conducted a test; I timed how long it took for me to setup the Mini 2 and Mini 3. Starting out with the drone and controller out of my bag, I had to unfurl the drone arms, remove the gimbal cover, power the drone and controller on, and connect the phone. The test ended when the drone sent a video signal back to the controller. It took 45 seconds for me to setup the Mini 3, and a minute to setup the Mini 2 with a phone.
That’s 15 seconds of additional fiddling, which is annoying. But it’s only 15 seconds. In both of these tests I was just setting up the drone at my normal pace, I wasn’t trying to be particularly quick—I could probably make both a little faster by working out which thing to turn on first to ensure the controller is booted up and the drone has a GPS connection as fast as possible.
The biggest disadvantage of the DJI RC is that it is much more delicate than the standard controller. The standard controller is built like a robust game controller, it’s hefty and doesn’t have anything that can break easily. When travelling I keep it right in the bottom of my bag alongside the drone batteries. You could drop it on concrete and it would almost certainly be fine. The DJI RC on the other hand has a large screen right on the front. I keep it in a little microfibre bag in case the drone scratches it. I don’t know what I’ll do when I travel with it; maybe I can put it in the bottom of my bag with the screen facing upwards? (It’s a Peak Design Everyday Zip so it’s very well padded anyway)
Oh and the thumb sticks! Both controllers have thumb sticks that screw into the controller, but what no one told me was that the screw threading is much worse on the DJI RC. On the standard controller, the thumb stick is the bolt and the controller has holes. The thread is quite large, and it’s easy to screw them in even if your hands are cold. On the DJI RC, the hole is on the bottom of the thumb stick itself, and the thread is tiny which makes it much more fiddly to put on. I’m now seriously considering whether I could get some custom low-profile thumb sticks made that can stay on the controller permanently.
The Mini 3 Pro is an impressive jump from the Mini 2, which brings my drone photos much closer in quality to photos from my real camera. You can see both types of photos on my photos website, Pixelfed, or Instagram.
-
The Sony a6X00 line of cameras are incredibly popular for video, and so it was really hard to find useful information comparing photos when I upgraded from the a6000 to the a6500. ↩