Overcoming a Fear of Containerisation

I was first introduced to containers at a Docker workshop during my first software engineering internship. The idea was enticing; the ability to package up your applications configuration in a standard way, and run that on a server without having to first to through manually installing dependencies and adjusting configuration. This was while I was still deep in Ruby on Rails development, so setting up servers with things like Puma and Unicorn were all too familiar.

However I never really managed to live the containerised dream. The Docker CLI was clunky (you’ve either got to write out the tag for your image every time, or copy-paste the image ID), and I couldn’t find much information on how to deploy a Rails application using docker without going all the way to Kubernetes.

There were tonnes of blog posts that described how to use containers for development, but then said that you should just deploy the old-fashioned way—this was no good! What’s the point of using containers if you still have to toil away compiling extensions into nginx?

Another questionable practice I saw was people using one Dockerfile for development and one for production. To me this seemed to be against the whole point of Docker—your development environment is supposed to match production, having two different configs defeats the whole purpose.

Although if we fast forward to sometime earlier this year, when I decided to have a look at Podman and understood more about the tradeoffs with designing a good Containerfile. What I realised was that having one Containerfile is a non-goal. You don’t need to have your development environment match production perfectly. In fact you want to have things like debug symbols, live reloading, and error pages so the two are never going to be the same anyway.

I shifted my mind from “one config that deploys everywhere” to “multiple configs that deploy anywhere”. Instead of having one Containerfile I’d have multiple, but be able to run any of them in any context. If there’s a problem only appearing in the “production” image, then you should be able to run a container from that image locally and reproduce the issue. It might not be as nice of a development experience, but it’ll work.


So then we get really deep into the land of designing effective Containerfiles. Let me take you on a journey.

We’ll start out with a simple Ruby program:

# main.rb
puts "I'm a simple program"

And we’ll make a fully productionised1 Containerfile for it:

FROM ruby:latest
WORKDIR /src
COPY Gemfile .
RUN bundle install
COPY main.rb .
ENTRYPOINT ["ruby", "main.rb"]

Our development iteration then goes something like:

  1. Make a change to main.rb
  2. Build a new image: podman build -t my-image .
  3. Run the image: podman run -it --rm test:latest
  4. Observe the results, and go back to 1

Building the image takes a few seconds, and that’s without any dependencies and only one source file. If we’re not careful about the ordering of our commands in the containerfile, we can end up with a really slow build. And we have to do that every time we want to run the container! We’ve just taken the fast iteration of an interpreted language and made it as slow as a compiled one.

Thes is the point that I had previously lost interest in containers, it seemed like a very robust way to slow down development for the sake of uniformity. However, if we allow ourselves to have multiple images we can significantly improve our iteration speed.

The key is to use the development image as a bag to hold all of our dependencies, but not our source code. It has all the pieces the application needs to run (a compiler/interpreter and all our libraries) but none of the source code.

We then use a bind mount to mount the source code to the container when we run it—which stops us having to re-build the image every time we make a change to our source files. Development looks something like this now:

  1. Make a change to main.rb
  2. Run the development image:2
    podman run --mount=type=bind,src=.,dst=/src -it --rm test:latest
    
  3. Observe results

Starting a container has very little time difference from starting a new process, so by omitting the build step we’re working at the same speed as if Ruby was running directly on the host. We only need to do the slow re-build if our dependencies change.

When it comes time to deploy our amazing script, we can use a more naive containerfile that copies the source code into the image—build time doesn’t matter nearly as much here.

Since I’m writing in Crystal most of the time, I’ve ended up with a Crystal containerfile that I’m pretty happy with:

FROM docker.io/crystallang/crystal:latest-alpine
WORKDIR /src
COPY shard.yml .
RUN shards install
ENTRYPOINT ["shards", "run", "--error-trace", "--"]

This installs the dependencies into the image, and sets the entrypoint so that arguments will be passed through to our program, instead of being interpreted by shards. The source files are mounted into the container in the same way as with the Ruby example.

I noticed that builds were always a little slower than I would expect, and remembered that Crystal caches some build artefacts, which would get thrown away when the container exited. So I mounted ~/.cache/crystal in the container to a folder, so that it would be persisted across invocations of the container. Doing this sped up the builds to be in line with running the compiler directly.

This frees me up to have a fairly involved “production” containerfile, optimising for a small final image:

FROM docker.io/crystallang/crystal:latest-alpine AS builder
WORKDIR /src
COPY shard.yml .
RUN shards install
COPY src ./src
RUN shards build --error-trace --release --progress --static

FROM docker.io/alpine:latest
COPY --from=builder /src/bin/my-project /bin/my-project
ENTRYPOINT ["/bin/my-project"]

Living the multi-image lifestyle has meant that I can use containers to run any one of my projects (including when I run this website locally to make changes) in the same way without having a major development experience impact.

Although these commands are quite long, and I can’t type that fast or remember all those flags. So I made a command-line tool that makes dealing with multiple images or containers easier. That’s actually what I have been using to do my development, and to run projects on my home server. You can read more about it:

The tl;dr is that with some fairly simple config, I can run any project with just:

$ pod run

Which runs a container with all the right options, even simpler than using shards run.

  1. My productionised Containerfile might not match your standards of productionisation. This is for tinkering on in my free time, so corners are cut. 

  2. Wow that’s a long command, if only we didn’t have to type that every time! 


Photomator for MacOS

Since moving my photo editing to MacOS just over two years ago, I have been using Pixelmator Pro as my photo editor of choice. The move from Pixelmator Photo was easy—the editing controls are the same, and I’m generally familiar with layer-based image editors from a misspent youth using the GIMP.

However, the workflow using Pixelmator Pro in Apple Photos was not ideal—it works as a photo editor extension, so you need to first enter the standard edit mode in Photos, and then open the Pixelmator Pro extension. Once you’re done with your edits you need to first save in Pixelmator and once again in Apple Photos. While this is no means a dealbreaker—I’ve been doing this for over two years—it is clunky. On the occasion I deviate from landscape photography and take photos of people, I typically have many photos that require a little bit of editing, rather than a few photos that require a lot of editing. This is where the Pixelmator Pro workflow really falls down.

So of course Photomator for MacOS is the natural solution to my photo-editing problems. It’s been out for just over a week now, and I’ve been using the beta for a few weeks before the release.

Just like its iOS counterpart, Photomator provides its own view into your photo library, along with the familiar editing interface that is shared with Pixelmator Pro. The key improvement is that you can immediately jump from the library into editing a photo with just a single keypress, since there are no Photos extension limitations at play here. I’d say this saves a good 5 seconds of waiting and clicking on menus per image. It also makes me more likely to try out editing a photo to see what an adjustment looks like, since I don’t have to navigate through any sub-menus to get there.

Previously

My workflow with Pixelmator Pro was fairly simple—I’d import photos into Photos, creating an album for each photo “excursion” I went on. I would flick through the album a few times, favouriting the ones that stood out (in Photos pressing “.” will toggle favourite on a photo).

I’d then switch over to the Favourites view, and on each photo I’d click open the edit view, open “Edit with” > “Pixelmator Pro”, and then actually do the editing. After editing I click “Done” in the Pixelmator extension, and “Done” in the Photos edit interface.

Since the extension is full Pixelmator Pro, you have full layer control and the ability to import other images. So if I’m stacking photos, I would just add a new layer using the Pixelmator photo picker. This is the quickest way of editing multiple photos as layers while staying inside the Photos system (ie having your edits referenced to a photo in the photo library).

If I need to create a panorama or stack stars for astrophotography, I’d export the originals to the filesystem and import them into Panorama Stitcher or Starry Landscape Stacker1, and then re-import the result.

Currently

With Photomator, this workflow hasn’t changed that drastically. The main difference is that I don’t have to do multiple clicks to get to the Pixelmator Pro editing interface.

I start out the same way by importing from an SD card into Photos (I could do this in Photomator, but I don’t see a benefit currently). In the album of imported photos I flick through my photos, favouriting the ones worth editing. This is still done in Photos as Photomator has a noticeable (about 400ms) delay between showing a photo and rendering an appropriate-quality version. This is distracting if you’re trying to go quickly, so I stick to doing this part in Photos.

Next I go through the favourites in Photomator (the delay doesn’t matter here as every photo is worth an edit) and apply basic edits. If something requires adjustments that Photomator doesn’t support (basically anything with multiple image layers, like an exposure bracket, or other multi-photo blend) then I’ll go back to Photos and open the Pixelmator Pro extension to make the changes.

With time, I’m sure the shortcomings in Photomator will be patched up, and I’ll be able to simplify my workflow.

Ideally I would import straight into Photomator—perhaps through a Shortcut or other piece of automation to filter out unwanted JPEGs2—and then triage the photos in the Photomator interface. I could then work through my edit-worthy photos, applying quick adjustments and crops right there.

Anything that requires more tweaks, could be seamlessly opened in Pixelmator Pro with a reference back to the original image in Photos. When I save the edit in Pixelmator Pro, the original image should be modified with my edits. If I re-open the image in Photomator, it should know that it was edited in Pixelmator Pro and use that as the editing interface.

I could use Photomator full-time without smart albums, but they are such a powerful feature in Photos for keeping things organised that I would almost certainly go back to Photos to use them. A quick search seems to show that NSPredicate supports arbitrary expressions, so it doesn’t seem like there’s an API limitation that prevents Photomator from doing this.

We’re definitely still in early days of Photomator on MacOS. I’ve had a few crashes (no data loss, thankfully), and there are a few odd behaviours or edge cases that need to be tidied (most annoying is that images exported and shared via Airdrop lose their metadata). The team is responsive to feedback and support email, so I’m confident that this feedback is heard.

So after using the beta for a few weeks, I ended up buying the lifetime unlock (discounted) as soon as the first public release was out. I have edited thousands of photos in Pixelmator Pro on MacOS and Pixelmator Photo on iPadOS, and am quite happy to pay for a more convenient and focussed version of the tool that I’m most familiar with.

Photomator would be my recommendation to anyone that is wanting something more powerful than the built-in editing tools in Photos, as long as they’re not likely to need the layer-based editing currently only offered by Pixelmator Pro. Although the pricing is a bit weird, Photomator is about the same cost in yearly subscription as Pixelmator Pro is to buy. I wouldn’t be surprised if Pixelmator Pro becomes a subscription soon.


A side note that I can’t fit elsewhere: Nick Heer (Pixel Envy) wrote:

For example, the Repair tool is shown to fully remove a foreground silhouette covering about a quarter of the image area. On one image, I was able to easily and seamlessly remove a sign and some bollards from the side of the road. But, in another, the edge of a parked car was always patched with grass instead of the sidewalk and kerb edge.

The Pixelmator folks definitely lean into the ML-powered tools for marketing, but I generally agree with Nick that they don’t work as flawlessly as advertised—at least without some additional effort. You can get very good results by combining the repair and clone tools to guide it to what you want, but expecting to be able to seamlessly remove large objects is unrealistic.

I also found the machine learning-powered cropping tool produced lacklustre results, and the automatic straightening feature only worked well about a quarter of the time. But, as these are merely suggestions, it makes for an effectively no-lose situation: if the automatic repair or cropping works perfectly, it means less work; if neither are effective, you have wasted only a few seconds before proceeding manually.

This is the real key, the ML tools can be a great starting point. They have a very low cost to try (they typically take less than a second to compute on my M1 MacBook), and they’re easy to adjust or revert if they do the wrong thing. Almost all edits that I make start with an ML adjustment to correct the exposure and white balance—and it often does a decent job.

  1. Starry Landscape Stacker does what it says on the tin, but it is also an example of software that requires some significant UX consideration before anyone would enjoy using it. 

  2. Consumer-level DJI drones can shoot in RAW, but can’t only shoot in raw. They will shoot raw+JPEG, so you’re forced to fill your SD card with JPEGs just to delete them before importing the raw files to your computer. 


Complicated Solutions to Photo Publishing

As previously discussed there have been some challenges keeping the photos on my website up-to-date. The key constraint here is my insistence on using Jekyll for the website (rather than something with a web-based CMS) and wanting somewhat-efficient photo compression (serving 20MB photos is frowned upon). Obviously I considered writing my own CMS for Jekyll with a web interface that I could access from my phone—this seemed like the natural thing to do—but I quickly realised this would spiral into a huge amount of work.

My intermediate idea was absolutely brilliant—but not very practical, which is why it’s the intermediate idea. The key problem that I had before was that Shortcuts is cursed and every second I spend dragging actions around takes days off my life expectancy due to the increase in stress. The resizing and recompression would have to happen on a Real Computer™. Thankfully I have a few of those.

Something I didn’t mention in my previous blog post was that there was another bug in shortcuts that made this whole situation more frustrating. The “Convert Image” action would convert an image to the output format (eg JPEG) but it would also resize the output file to be about 480px wide. This was really finally broke my will and made me give up on Shortcuts. If I can’t trust any of the actions to do what they say and instead have to manually verify that they’re doing what they say after every software update… I might as well just do the actions myself.

Speaking of OS updates breaking how images are handled: MacOS 13.3.1 broke rendering of DJI raw files, which stopped me from editing drone photos. This is thankfully now fixed in 13.4.

So the main challenge was how to get the images from my phone to a real computer that could do the conversion and resizing. My brilliant solution was to use a git repository. Not the existing GitHub Pages repo, a second secret repository!

On my phone I would commit a photo—at full resolution—to the secret repo and write the caption and other metadata in the commit message. This would be pushed to a repo hosted on one of my computers, and a post-receive hook would convert the images, add them to the actual git repo, and write out a markdown file with the caption. Truly the epitome of reliability.

Thankfully, I never actually used this house of cards. I ended up signing up to Pixelfed (you can follow me!), which has a decent app for uploading photos with a caption. Being a good web citizen, Pixelfed publishes an RSS feed for user posts. So all I have to do is read the feed, download the images, copy it over to my website, and publish them.

Naturally the program is written in Crystal (and naturally I came across a serious bug in the stdlib XML parser). It checks if there are any posts in Pixelfed that aren’t already on the website, downloads the photos, uses the ImageMagick CLI (which I think can do just about anything) to resize, strip metadata, and re-encode them, and then commits those to a checkout of the GH pages repository.

This was running via cron on my home server for a while, but I’ve recently containerised it for a bit of additional portability. It does still need access to my SSH keys so it can push the repo as me, since that was just much easier than working out the right incantations to get GitHub to give me a key just for writing to this one repo.

The biggest drawback of this solution is that images on Pixelfed (or at least pixelfed.nz, the instance that I’m on) are only 1024px wide, which is just a bit narrower than a normal sized iPhone screen so the images don’t look amazing.

To be honest, now that I’ve gone through all this effort and have a container running a web server at all times… I might as well just make an endpoint that accepts an image and commits it to the repo for me.

Shortcuts can somewhat reliably send HTTP requests, so it’s just a matter of base64-ing the image (so you don’t have to deal with HTML form formats and whatnot), making a cursed multi-megabyte JSON request, and have the server run the exact same resizing logic on the image it receives.

So now if you look at my photo website you should see some recent photos are a bit higher quality now:

A drone photo of the Sydney city skyline

You might even be able to zoom in and spot me somewhere in that photo!


DJI DNG Rendering Broken on Ventura

As previously mentioned I use my M1 MacBook Air to edit photos, which I post on my website and on Instagram. This past weekend I went to the beach and flew my drone (a wee DJI Mini 2) around, and got some nice pictures of the rocks, sand and the stunningly clear water.

Well, I thought they were good until I got home and looked at them on my laptop—every one of them had a horrible grid of coloured blobs overlaid on it, which made them basically unsalvageable. This is not something I’d come across before with my drone, so it was definitely a surprise. Naturally I started debugging.

A photo from my DJI Mini 2 with coloured splotches over it in a grid

My first thought was that it was glare from the polarising filter that I usually have attached, however it was present on all the photos—not just the ones facing towards the sun. Nevertheless I powered the drone up and took some shots without the polariser on. My next thought was that there was a bad software update, and that another software update would fix the issue. There was an update available so I applied that, and took a few more test shots.

When I had the images loaded onto my laptop I could see that photos without the polariser and even with the software update still had the issue. JPEGs were unaffected, so this is just a raw image problem. Very strange. Thankfully I have plenty of other images from my drone in similar situations, so I can compare and see if maybe I was missing something. There aren’t any issues with any of my old photos, but then I remember that Photos is probably caching a decoded preview, rather than reading the raw file every time. So that means if I export the DNG file and try to preview it, it should fail.

Gotcha! It’s a bug in MacOS! If I export any raw file from my drone and preview it on Ventura, it renders with terrible RGB splotches in a grid all over it. The silver lining is that the photos I took at the beach are still intact—I just can’t do anything with them right now.

I wondered if other DNG files have the same issue, so I took a photo with Halide on my iPhone and downloaded a DJI Mini 3 Pro sample image from DPReview. The iPhone photo rendered fine, and the Mini 3 photo was even more broken than my photos:

Sample photo from Mini 3 Pro with brightly coloured vertical lines all the way across the image

Naturally the next thing to do is to try and work out how widespread the issue is while chatting with support to see if they can tell me when it might be fixed. I only managed to work out that my old laptop (Big Sur) has no issues, and that there are some forum posts if you already know what to search for (“DNG broken MacOS” didn’t get me many relevant results at the start of this escapade).

Support says that I just need to wait until there’s a software update that fixes it. So no drone photos until then.

Update: MacOS 13.4 appears to have fixed this issue.


Hardening with ssh-audit

My comment the other day about how I didn’t understand SSH encryption or key types very well got me thinking that maybe it’s something that I should understand a bit more.

Sadly I still don’t understand it, but thankfully you don’t have to because of the amazing ssh-audit tool, developed by Joe Testa (which is an excellent name for a penetration tester).

It tests both hosts and clients. You either give it the host:port to scan, or run it as a server and when a client connects it will print information about the encryption schemes supported by the client. It is not particularly reassuring when you see this printed in your terminal:

-- [fail] using elliptic curves that are suspected as being backdoored by the U.S. National Security Agency

There are some hardening guides for host and client configs for various distros—to be honest I would have rather just looked at an example config, rather than running a huge command that uses sed to edit what it expects to be in there. The huge commands did work, and the client guide even translated over to MacOS.

After a quick test connecting from various devices, I don’t seem to have cut off access for anything. I was able to:

  • Connect to my Synology DS420j (which has SSH security set to “High”)1
  • Connect to Ubuntu Server 22.04 from:
  • Push to GitHub

Of course the best bit is that ssh-audit is written in Python—so I was expecting to go through pip hell—BUT it has a Docker image that you can run instead:

$ podman run -it -p 2222:2222 docker.io/positronsecurity/ssh-audit host-to-check:port

So there’s basically no excuse not to just give it a quick check and make sure you’re up to snuff.

  1. The “High” setting scored pretty decently on the audit, enough that I didn’t bother trying to alter the config further. 

  2. Both of these apps generate their own RSA keys, but they’re obviously generating with whatever the current recommendations are.  2


Setting up podman-remote

podman-remote is a way of running Podman commands on a remote machine (or as different user) transparently. It allows you to add a transparent SSH layer between the podman CLI and where the actual podding happens.

For the uninitiated, Podman is basically more-open-source Docker that can be used (mostly) as a drop-in replacement. The biggest difference is that it can run rootless—which means even if a process can escape the container, they’re still limited by standard unix permissions from doing anything too nasty to the host.

There doesn’t seem to be foolproof instructions on setting up podman-remote from zero, so I thought I’d write down what I did here. I’ll refer to the computer that will run the containers as the “host machine” and the computer that you’ll be running podman commands on the “local machine”.

The first thing to do is log in to the host machine and enable the podman.socket system service:

$ systemctl --user --global start podman.socket

On one of my machines I got an error:

Failed to connect to bus: $DBUS_SESSION_BUS_ADDRESS and $XDG_RUNTIME_DIR not defined (consider using --machine=<user>@.host --user to connect to bus of other user)

I don’t know why these environment variables are not getting set, but I managed to find the values they should have, set them, and re-ran the command:

export DBUS_SESSION_BUS_ADDRESS=unix:path=/run/user/$UID/bus
export XDG_RUNTIME_DIR=/run/user/$UID

We should be able to see that it’s running:

$ systemctl --user status podman.socket
● podman.socket - Podman API Socket
     Loaded: loaded (/usr/lib/systemd/user/podman.socket; enabled; vendor preset: enabled)
     Active: active (listening) since Fri 2023-03-24 10:38:41 UTC; 1 month 11 days ago
   Triggers: ● podman.service
       Docs: man:podman-system-service(1)
     Listen: /run/user/1000/podman/podman.sock (Stream)
     CGroup: /user.slice/user-1000.slice/user@1000.service/app.slice/podman.socket

Mar 24 10:38:41 tycho systemd[917]: Listening on Podman API Socket.

Make note of the Listen: path, as we’ll need that later. If we’re running rootless, it should have the UID of the user that will run the containers in it—in my case that’s 1000.

Next we need to configure how to get to the host machine from your local machine. You can pass this config to the CLI every time, or set it via environment variables, but plopping it all in a config file was the most appealing approach for me. There’s even a Podman command that will add the config for you:

$ podman system connection add bruce ssh://will@hostmachine:22/run/user/1000/podman/podman.sock

The first argument is the name of the connection (that we’ll use to refer to this particular config). The second argument is a URI that specifies the transport (you can use a unix socket or unencrypted TCP, but SSH is probably best). The URI is in this form (with $SOCKET_PATH being the path we noted down earlier)

ssh://$USER@$HOST_MACHINE:$PORT/$SOCKET_PATH

We should see that ~/.config/containers/containers.conf has been updated with the new config:

[engine]
  [engine.service_destinations]
    [engine.service_destinations.bruce]
      uri = "ssh://will@bruce:22/run/user/1000/podman/podman.sock"
      identity = "/home/will/.ssh/id_ed25519"

Podman won’t use your SSH key by default, you need to add the identity entry yourself.

So I don’t know enough about SSH encryption schemes to explain this next bit. Basically if you use your “normal” RSA key, Podman won’t be able to make an SSH connection—seemingly even if manually ssh-ing to the host machine works. The solution is to generate a more secure ed25519 key on the local machine, and use that instead.

$ ssh-keygen -t ed25519

Then append the contents of id_ed25519.pub to authorized_keys on the host and you’re good to go.

Let’s test that it works: (replace bruce with the name you gave your host)

$ podman --remote --connection=bruce ps
CONTAINER ID  IMAGE                                 COMMAND               CREATED       STATUS           PORTS                   NAMES
4dd7d2e41348  docker.io/library/registry:2          /etc/docker/regis...  4 days ago    Up 4 days ago    0.0.0.0:5000->5000/tcp  registry
0c986c819fc2  localhost/pixelfed-piper:prod-latest  https://pixelfed....  27 hours ago  Up 27 hours ago                          pixelfed-piper

Success! We can now chuck --remote --connection bruce (or -r -c bruce) into any podman command and have it run on another machine. Possibilities include:

  • Lazy deployments
  • Transparent builds on more powerful hardware (note that COPY and such reads from the filesystem on the local machine!)
  • Quick debugging of remotely-deployed containers

And probably some more things, I’m quite new to this whole container lifestyle.


@willhbr: Origins

At some point my memory will fail me and I won’t be able to recall some of these details. So I’ve written it down for future-me to enjoy, and while it’s here you might as well read it.

Zero: Computers

My first interaction with a computer was after showing my dad my cool Lego minifig with a little chainsaw1 from my “Arctic Explorers” set:

The LEGO arctic explorers set with lots of cool lego action happening

My dad then showed me “stress.exe” where you could use a variety of tools (including a chainsaw) to destroy whatever was displaying on the computer. 6-year-old me found this amazing.

The family computer we had was a classic beige monster probably running Windows 98, with those cool little speakers that would clip onto the sides of the huge CRT display.

One: Programming

Fast forward a few years and I was playing around with stop motion animation, and the MonkeyJam splash-screen mentioned that it was written in Delphi. My dad made some comment about how I could probably write something in Delphi—not knowing about what programming involved, this sounded quite daunting.

My memory is a bit hazy on the next bit, I think it may have been hard to get a Delphi license or something (free and open source tooling is the only way to go!) so I ended up tinkering around in Visual Basic for a while.

I don’t remember doing any “programming” in VB—instead I just used the UI editor to drag buttons in and then make them show other screens when you clicked them. I definitely made some mazes where all the walls were buttons and you had to carefully manoeuvre the cursor through the gaps.

Eventually the rate of questions that I was asking my dad hit a critical threshold and I suggested that if he just helped me get started with Java, I could learn it all from a book and wouldn’t have to ask him anything. This was of course, not true.

Nevertheless I got a copy of Java 2: A beginners Guide, a fresh install of Eclipse, and I was on my way.

You know how most 11-year-olds would want to get home from school and play computer games for hours? Well instead I would slave away writing Java Swing applications.

With no concept of version control, backups, tests, code structure, or libraries I learnt how things worked by reading the Eclipse autocomplete and posts on the Sun Java forums. It’s amazing what you can do with unlimited time, a lot of patience, and no concept of the “wrong” way of doing something.

Two: The USB Years

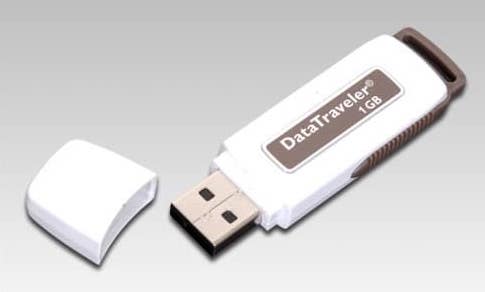
At some point while I was off in Java land, my dad installed Ubuntu2 on the family computer (why? unclear). This started my dive into the world of ultra-small Linux distros. I played around with running Damn Small Linux from a USB drive in QEMU in Windows (with limited success), I then graduated to Puppy Linux which was more usable but still left a lot of space on my 1GB USB drive.

The exact USB drive that I used to have (and probably have in a drawer somewhere)

These tiny distros were great to pull apart and see how things worked, and the community was full of people who were doing the same kind of tinkering—rather than doing real work. This gave plenty of practice in booting from live CDs, installing Linux distros, and debugging the inevitable problems.

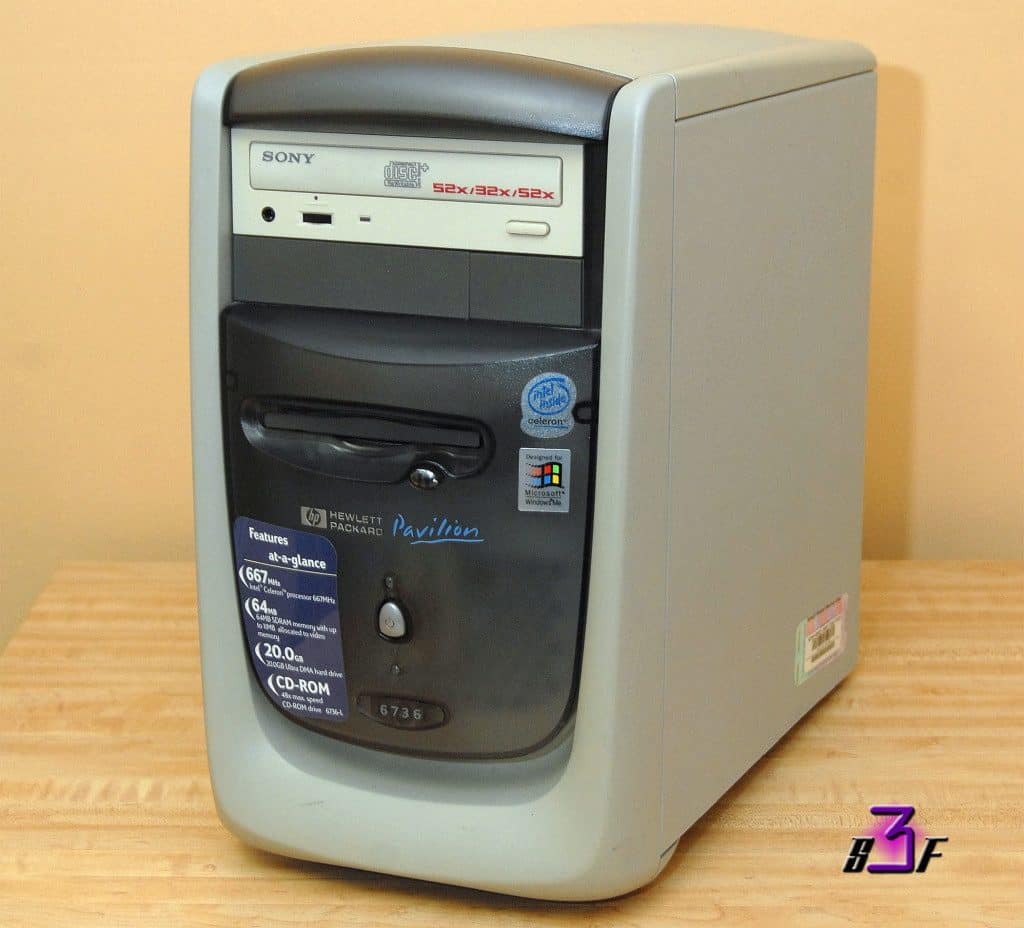
Eventually I scraped together enough money to buy my own computer—a $20 Windows ME-era desktop from a recycling centre3:

My first computer (well, one that looks just like it)

Side note: I’ve had amazing luck while writing this being able to find pictures of things. I searched for “Kingston 1gb usb drive” and “hp pavilion windows me desktop” and got images of exactly what I was looking for immediately.

I’m not sure of the exact specs, but this probably had 600MHz clock, 128MB or 256MB of RAM, and a 15GB HDD. Even running a 100MB OS was challenging for this machine. I disassembled and reassembled this computer countless times as I would scrounge parts from other broken PCs. In the end I think it had 768MB of RAM and a 40GB HDD.

The next few years were spent trying to get my hands on newer hardware, and assembling a Franken-PC from the best bits. I think the peak of my power was a Pentium 4, and a 17” LCD monitor—a huge upgrade from the ~14” CRT that I had started with.

Three: Netbook

It’s 2010. The netbook craze is at its peak.

My parents helped me buy an Acer Aspire One netbook. This thing was the absolute bomb; it had more storage than all my Franken-PCs combined, it had wifi built in which would give me reliable internet anywhere in the house4.

By this point I was riding the Ubuntu train full-time, and so installed Ubuntu Netbook Edition 9.10 (Karmic Koala)5 on it immediately—replacing Windows 7 Starter Edition. The tinkering didn’t stop now that I had reliable hardware, I remember installing the Compiz settings manager to play around with thing like wobbly windows, deciding that I wanted to remove them to save valuable system resources, and ended up uninstalling Compiz itself. Since Compiz is actually the window manager and not some layer that just wobbles your windows, I had a very fun time trying to fix my system while all my windows were missing their chrome.

Having a (somewhat) reliable computer meant that I got back to programming more, and I ditched Java Swing in favour of Ruby on Rails. The web is unparalleled in being able to make something and share it with others. Before, the things that I had made were mostly hypothetical to others, but once it’s on the web anyone can go and use it.

My most successful project was a fake stock market game, where you could invest in, and create companies whose stock price would go up and down semi-randomly. Most of the fun was in giving your company a wacky name and description and then being amused when the stock price soared or tanked. This captured the zeitgeist of my school for a few weeks.

Free web hosting (specifically the old free Heroku tier) for real applications did so much to motivate me as I was learning web development. Being able to easily deploy your application without paying for dedicated hosting, setting up a domain, or learning how to setup a real server was so valuable in letting me show my work to other people. I was sad to see Heroku stopping this tier, but glad to see things like Glitch filling the niche.

I also made my first Android app on my netbook. Running Eclipse and an Android emulator with 1GB of RAM to share between them seems horrifying now, but when that’s your only option you just make do. I do remember being massively relived when I accidentally found out that I could plug my phone in and develop the app directly on that, instead of using the emulator.

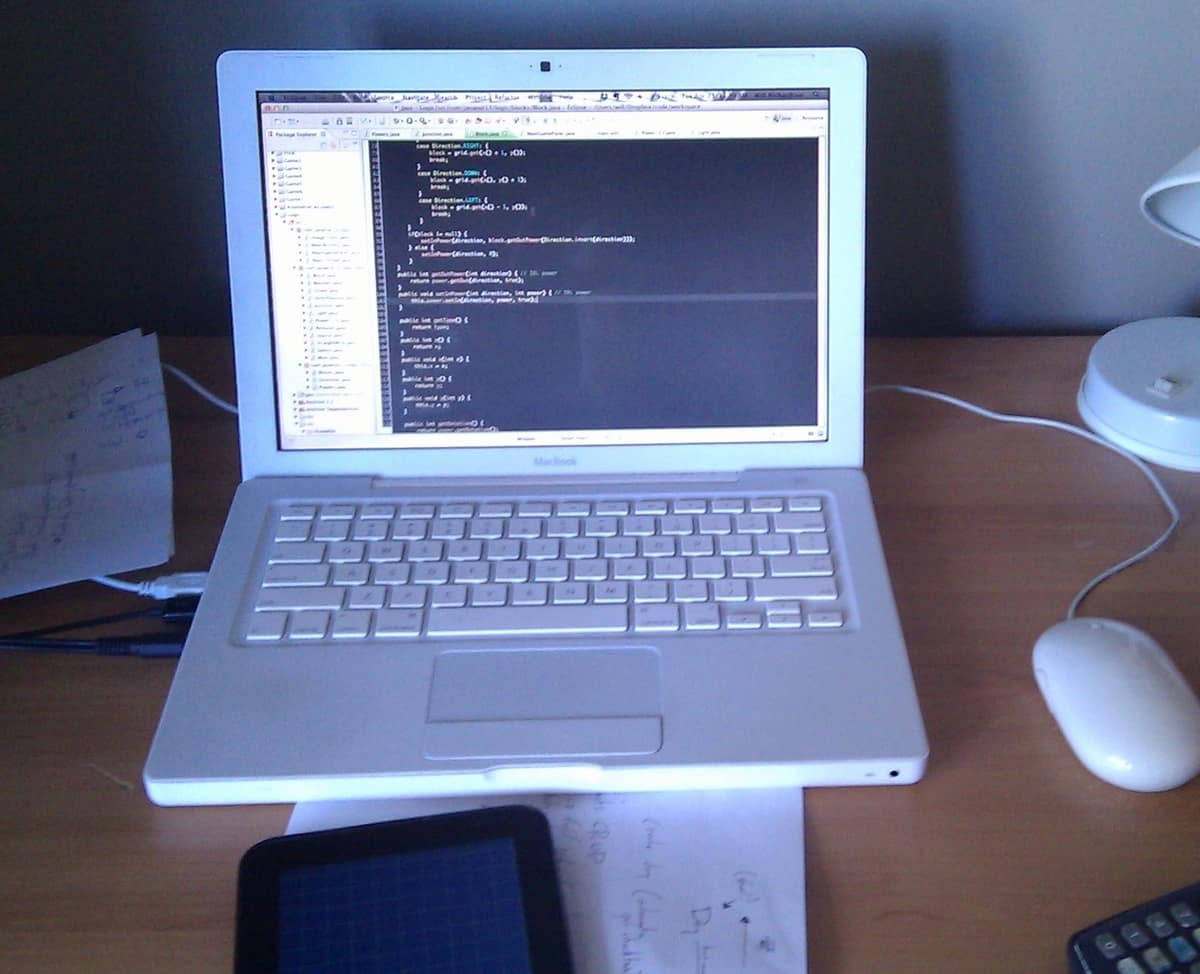
Eventually I replaced the netbook with a MacBook (one of the white ones that were actually just called “MacBook”)—but still ran Ubuntu6 until I realised that Minecraft ran way better on OS X.

Despite having made applications on a variety of different platforms, I hadn’t strayed very far into different languages. I’d had to use Python for school and uni, but it’s not much of a change from Ruby. It wasn’t until 2014 and the introduction of Swift that I actually learnt about a statically-typed language with more features than Java. The idea that you could have a variable that could never be null or could not be changed was completely foreign to me.

Four: Peak Computing

The MacBook was eventually replaced with a MacBook Pro and then a MacBook Air when I was in university. At this point I felt like my computer could do anything. Unlike my netbook I could run external displays7, install any IDE, SDK, or programming language. There would be countless different tools and packages installed on my machines. I’d usually have both MySQL and PostgreSQL running in the background (until I realised they were wasting resources while not in use, and wrote a script to stop them).

Academically I know that my current computer(s) are much, much faster than any of these machines were. However I’m still nostalgic for the sense of freedom that the MacBook gave me. It was the only tool I had, and so it was the best tool for any job.

My MacBook, hard at work making an app that simulated cicuits

Five: Down the Rabbit Hole

It must’ve been 2012 when I read “I swapped my MacBook for an iPad+Linode”. The idea was so enticing—having all the hard work happen somewhere else, being able to leave your computer working and come back to it being as though you never left.

However it seemed completely out of reach—it relied on you being able to use a terminal-based text editor, and while I could stumble around Vim it was nowhere near as effective as using TextMate. It was like my dream of having an electric longboard—hampered by the cold reality of me not being able to stand on a skateboard.

Much like my learning to skateboard (which was spurred by a friend helping me stand on their longboard, showing me that it wasn’t impossible)—my journey down the Vim rabbit hole started with a friend pointing out that “you can just use the Vim keybindings in Atom” (which allows you to do some Vim stuff, but also use it like a normal text editor).

At university my interests veered into more and more abstract projects. Instead of making apps and websites for people to use, I was learning Haskell to implement random algorithms and writing Lisp compilers.


So if you ever wondered “why is Will like this”, maybe this will help answer.

  1. Actually in terms of Lego scale, it was about half this guy’s height so not really a little chainsaw. 

  2. Just going from vibes on my memory of the Ubuntu versions, I think this would have been 7.04 (Feisty Fawn). 

  3. Credit to www.3sfmedia.com, who seem to restore and sell really old PCs? Or they’re just an out-of-date computer shop. 

  4. On my desktops I had to use a USB wifi dongle, which would interfere with my cheap speakers and make a buzzing noise whenever it was sending data. 

  5. This particular version of Ubuntu seemed to work really well on the netbook, and so even more than a decade later I am still nostalgic for this one version. 

  6. Installing Linux on Apple hardware is one of the most painful things you can do, I would not recommend it to anyone. Clearly The USB Years had made me foolhardy enough to try this. 

  7. I think the netbook could actually do this, but it would be a really bad time for all involved. 


Making a Website for the Open Web

The open web is complicated1. Over the last few months I’ve been trying to make my website work with as many standards as I could find. I couldn’t find a guide on all the things you should do, so I wrote down all the things I’ve done to make my website integrate better with the open web:

Accessibility

Running an accessibility checker on your website is a good start. I used accessibilitychecker.org, which can automatically detect some low-hanging improvements.

The easiest thing was setting the language on the root tag on the website, so that browsers and crawlers know what language the content will be in:

<!DOCTYPE html>
<html lang="en">

Since I’m still young1, I don’t have much trouble reading low-contrast text, I didn’t notice how close in brightness some of the colours that I had picked were. I initially used coolors.co’s tool, but then ended up using the accessibility checking devtools in Firefox to ensure that everything was within the recommended range.

This was the colour that I had been using for the titles and links in dark mode. It’s not very readable on the dark background.

This is the new colour that I changed it to, which has much better contrast.

Add Feeds

I already had an RSS Feed and a JSON Feed setup, but I double checked that it was giving the correct format using the w3 RSS Validator and the JSON Feed validator.

What I had missed adding was the correct metadata that allows browsers and feed readers to get the URL of the feed from any page. If someone wants to subscribe to your feed, they don’t have to find the URL themselves and add that, they can just type in your homepage and any good reader will work it out for them. This is just a single HTML tag in your <head>:

<link rel="alternate" type="application/rss+xml"
  title="Will Richardson"
  href="https://willhbr.net/feed.xml" />

JSON Feed didn’t take the world by storm and replace XML-based RSS, but it is nice having it there so I can get the contents of my posts programatically without dealing with XML. For example I’ve got a Shortcut that will toot my latest post, which fetches the JSON feed instead of the RSS.

OpenGraph Previews

I wrote about this when I added them, since I was so stoked to have proper previews when sharing links.

My assumption had always been that services just fetched the URL and guessed at what image should be included in the preview (I guess this is what Facebook did before publishing the standard?).

Sites like Github really take advantage of this and generate a preview image with stats for the state of the repo that’s being shared:

An OpenGraph image from Github, showing the stats for this repo

Dark Mode

Your website should respect the system dark-mode setting, which you can get in CSS using an @media query:

@media(prefers-color-scheme: dark) {
  /* some dark-mode-specific styling */
}

This is fairly easy to support - just override the colours with dark-mode variants - but it gets more complicated if you want to allow visitors to toggle light/dark mode (some may want to have their OS in one mode but read your site in a the other).

I won’t go into the full details of how I implemented this, but it boils down to having the @media query, a class on the <body> tag, and using CSS variables to define colours. Look at main.js and darkmode.sass for how I did it.

Alias Your Domain to Your ActivityPub Profile

Something else I wrote about earlier. Not something that I think everyone needs to do, but if you like the idea of a computer being able to find your toots from your own domain, it’s probably worth doing. Especially because it’s quite straightforward.

Good Favicons

Back in my day you’d just put favicon.ico at the root of your website and that would be it. Things are a little more advanced now, and support a few more pixels. I used this website to turn my high-res image into all the correct formats. It also conveniently gives you the right HTML to include too.

Add robots.txt

I added a robots.txt file that just tells crawlers that they’re allowed to go anywhere on my site. It’s entirely static, any nothing is intended to be hidden from search engines.


If I’ve missed a standard that belongs on my website, please toot me!

  1. Citation needed.  2


Installing rsnapshot on Synology DS420j

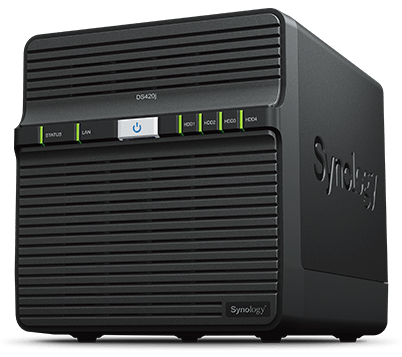
I’ve got a shiny new Synology DS420j, and I’m in the process of re-implementing the wheels of computer suffering that I call my backup system on it. Part of this is setting up rsnapshot to create point-in-time snapshots of my backups, so I can rewind back to an old version of my data.

A marketing image of a Synology DS420j NAS

There are plenty of instructions on how to setup rsnapshot using Docker on the higher-end Synology models, but when you’re shopping at the bottom of the barrel you don’t have that option. We’ve got to install rsnapshot directly on the Synology - the most cursed Linux environment ever1.

All the instructions I could find were quite old, and the landscape seems to have changed. Synology have changed their package format, so old packages cannot be installed on newer DSM versions (according to this German forum post) which means anything that tells you to install pages from cphub.net probably doesn’t work any more. ipkg is also no longer maintained and has been replaced by Entware. Once I knew that, the process was relatively straightforward.

Preamble

You probably need to enable the rsync service, enable ssh, etc for this to work. I’m assuming that you’ve got a Synology already setup that you can SSH into and sync files to from your other computers. If you don’t, then you should sort that out and then come back. I’ll wait.

Install Entware

Entware have detailed installation instructions on GitHub. Remember that the DS420j is armv8, check yours with cat /proc/cpuinfo.

Once you’ve yolo-run the various install scripts and added enough backdoors into the device that holds all your most valuable information, you just need to add the scheduled tasks to keep Entware from being removed (take note of this, we’ll use this again later for rsnapshot).

Setup rsnapshot

Now we can use opkg to install rsnapshot:

$ sudo opkg install rsnapshot

And then edit /opt/etc/rsnapshot.conf to taste. For example here’s mine:

config_version  1.2

snapshot_root  /volume1/rsnapshot

# Commands
cmd_cp  /bin/cp
cmd_rm  /bin/rm
cmd_rsync  /usr/bin/rsync
cmd_ssh  /usr/bin/ssh
cmd_logger  /usr/bin/logger
cmd_du  /usr/bin/du
cmd_rsnapshot_diff  /opt/bin/rsnapshot-diff

# Backups
retain  daily  28
retain  weekly  26

# Opts
verbose  2
loglevel  3
logfile  /var/log/rsnapshot.log
lockfile  /var/run/rsnapshot.pid

backup  /volume1/Backups  Backups/

Now check that the config is valid:

$ sudo rsnapshot configtest
Syntax OK

Schedule rsnapshot

We could use cron to schedule our rsnapshot job, but since Synology isn’t quite normal Linux, I think it’s best to use the built-in GUI rather than install more custom packages.

The task is fairly simple, just click “Create” > “Scheduled Task” > “User-defined script” and setup:

  • Task: “rsnapshot daily”
  • User: root
  • Schedule: every day, probably sometime when you’re not likely to be using the Synology. I set mine to run at 2am.
  • Task Settings: “run command” should be something like /opt/bin/rsnapshot daily (I used the full path Just In Case™ there is $PATH weirdness).

Save the task and accept the dialog that tells you you’ve voided your warrantee.

The task will be skipped if an instance is already running, you can use the Synology UI to start it ad-hoc, and you can easily see the status in the “View Result” screen. Which is a bit more user-friendly than cron.

This setup has successfully run on my Synology once (so far). Whether it will continue to work after reboots and software updates remains to be seen.

  1. citation needed. 


Geode: More Functions for Crystal

The only language I use for personal projects is Crystal. It is as easy to write as a dynamically typed language - so I don’t have to waste time telling the type system what I mean, but it has full type checking - so I also don’t waste time on easily preventable mistakes.

Crystal being the best programming language for side projects is a topic for another blog post. There’s a lot to say about how perfect it is.

Naturally this means that over the last 6 or so years that I’ve been using Crystal, I’ve assembled a messy collection of utility functions and classes that I share between projects.

I’ve collected some of the best bits into a library: Geode. Features include:

More bits will be added as I need them.

If for some reason you do use this, be aware that I am changing the behaviour of the stdlib, which might cause other things to break in weird and unexpected ways.